How it Works
This tool offered by the Austin School for the Driven is designed to help you transform your image files into a format that is well-suited for many applications commonly used in makerspaces, such as 3D printing.
Understanding Vectorized Images
Digital images come in two main file formats - bitmaps and vectors. Bitmap images, like JPG and PNG files, are made up of a grid of tiny colored pixels. This pixel-based approach allows bitmaps to accurately capture detailed images. However, bitmaps have a key limitation - when you zoom in on the image, the individual pixels become visible, resulting in a rough, pixelated appearance (Figure 1) [1].

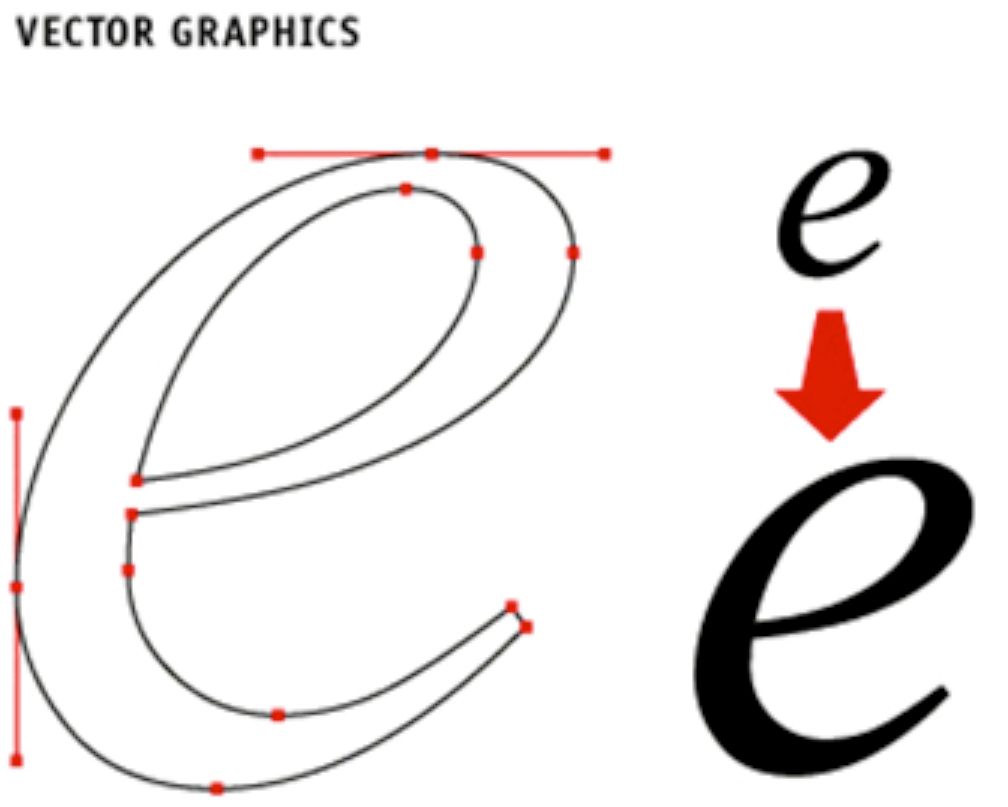
Many makerspace applications, such as 3D printers, require smooth, high-quality lines to ensure clean, sharp cuts and edges in the final product. Vector files, like Scalable Vector Graphics (SVG), solve this issue by describing the image using mathematical equations rather than a grid of pixels. As a result, vector images can be scaled up or down without losing quality - the lines and shapes remain smooth and sharp even when greatly enlarged (Figure 2) [1].
The primary benefit of vector files over bitmaps is their scalability. Bitmap images are resolution-dependent, meaning they look good at their native size but become pixelated when enlarged. Vector files, on the other hand, are resolution-independent. They define shapes and lines using equations, so the image can be scaled to any size without degradation. This makes them great for many different makerspace applications.
Using the Vectorization Tool
If you have a bitmap image, such as a hand-drawn sketch, that you want to use for your makerspace projects, you can use this tool to convert it into a high-quality SVG vector file. The tool will start by trying to find borders of dark lines on the paper, and use these to make lines. This means that the tool will be sensitive to different colors on the paper, as well as dark shadows. To avoid these issues:
- Take a picture of your drawing using flash. This will make sure that there aren't any shadows that could interfere with your drawing.
- Use plain white paper if possible. Avoid using paper with multiple colors or dark lines. This will make sure the tool focuses on your drawing and not the lines of the paper.
- Use only one color when making your drawing. This will make sure that the tool captures your entire drawing and is able to make smooth and sharp lines.
- Try using a darker color when making your drawing. Since the tool looks for borders of dark lines, darker colors will help the tool get the smoothest result.
- Try using a darker color when making your drawing. Since the tool looks for borders of dark lines, darker colors will help the tool get the smoothest result.
Another step that the tool takes when making your SVG is solving for the Parallax effect. The parallax effect is when things seem to get closer or farther away based on the angle that you look at them from. This effect makes drawing look different if you look at them from a sharp angle. Our tool uses the borders of the paper to determine the angle and adjust the paper to be at a perpendicular angle. To make sure that your SVG has proper handling of the parallax effect:
- Make sure the entire paper outline is visible in the picture. Since the tool uses the paper outline to solve the parallax effect, this will ensure that you will get the best results.
- Use a standard 8.5 x 11 paper. The tool is set to handle this paper size, and will best account for the parallax effect in these conditions.
- Try using a neutral background around the paper for your picture. This will make sure that the tool is able to identify clearly the borders of the paper to solve the parallax effect.
Once you have a picture of your drawing, upload it to the tool and select Convert Image to see a preview of your SVG. You may crop your svg on the left, and you will see a preview of your edited SVG on the right side. When cropping, the frame will stay in the ratio of 8.5x11, but feel free to move around the frame to re-center it to best fit your drawing. Once you are satisfied with the result, simply click download to get your SVG file.
Reference
[1] "Vector and Bitmap Image Guide." Business.oregonstate.edu, Oregon State University, https://business.oregonstate.edu/student-experience/resources/DAMlab/vector-and-bitmap-image-guide.